
Easy Banana Bread Baking Guide
Ever wondered why some banana bread tastes like heaven while others fall flat? The secret’s in the details, my friends. And I’m here to share all the insider tips on whipping up the most mouth-watering banana bread ever. It’s not just about throwing ingredients together; it’s an art of mixing things just right. So roll up your sleeves, grab those bananas that look like they’ve seen better days (trust me, they’re gold), and let’s get baking. Your taste buds are about to thank you!
Mixing Wet and Dry Ingredients Separately
Mixing Wet and Dry Ingredients Separately When Baking Banana Bread
Alright, future banana bread champs, let’s roll up our sleeves and dive into the nitty-gritty of crafting the perfect loaf. You might be pondering, “Why can’t I just chuck everything into one bowl and call it a day?” Well, hold your horses, because there’s some bakery wizardry at play here.
The secret to a stellar banana bread that’s both tender and scrumptious lies in the art of mixing. Combining the wet and dry ingredients separately before they meet is the kind of move that can take your baking from “meh” to “wow”. Here’s the scoop on why this method makes all the difference in the world.
- First off, the clump-free zone. Dry ingredients like flour, baking powder, and salt have this annoying habit of clumping together. Combine them first to break up any little flour parties and distribute your leaveners (think baking soda and such) to give your bread an even rise—no one wants a lumpy loaf with the sad, flat spots.
- Now, the wet ingredients—these are the juicy guys. Ingredients like mashed bananas, eggs, and melted butter need to get all cozy together. Blending these creates a smooth mixture, and hey, it even helps avoid overmixing when it’s time to unite the wet with the dry.
Speaking of overmixing, when you add the wet to the dry, it’s time for a harmonious merger. Gently fold them together just until they look like one happy family. Over-stirring is a no-no since it wakes up the gluten in flour, leading to a banana bread that could double as a brick—definitely not the dream.
Ever heard about resting dough for pancakes or muffins? Guess what, it’s like that. Mixing separately lets the flour chill out before it gets wet, ensuring a tender crumb structure in your final masterpiece.
So now you get it, right? Keeping wet and dry ingredients in their own corners before the ultimate mix helps control gluten development, makes for an even rise, and gives you that tender, crave-worthy banana bread. Follow these steps, and you’re well on your way to becoming the banana bread guru your friends will envy! Now, get to mashing those bananas and preheat that oven—delicious awaits!

Selecting the Right Bananas
Picking the Perfect Bananas for Scrumptious Banana Bread
Let’s chat bananas, folks! The secret to heart-stealing, taste-bud-pleasing banana bread lies in those humble yellow fruits. You want the sweetest, most aromatic bananas on the block to amp up the flavor in your bread. So, here’s the lowdown on how to snag the best of the bunch for that moist, delectable goodness.
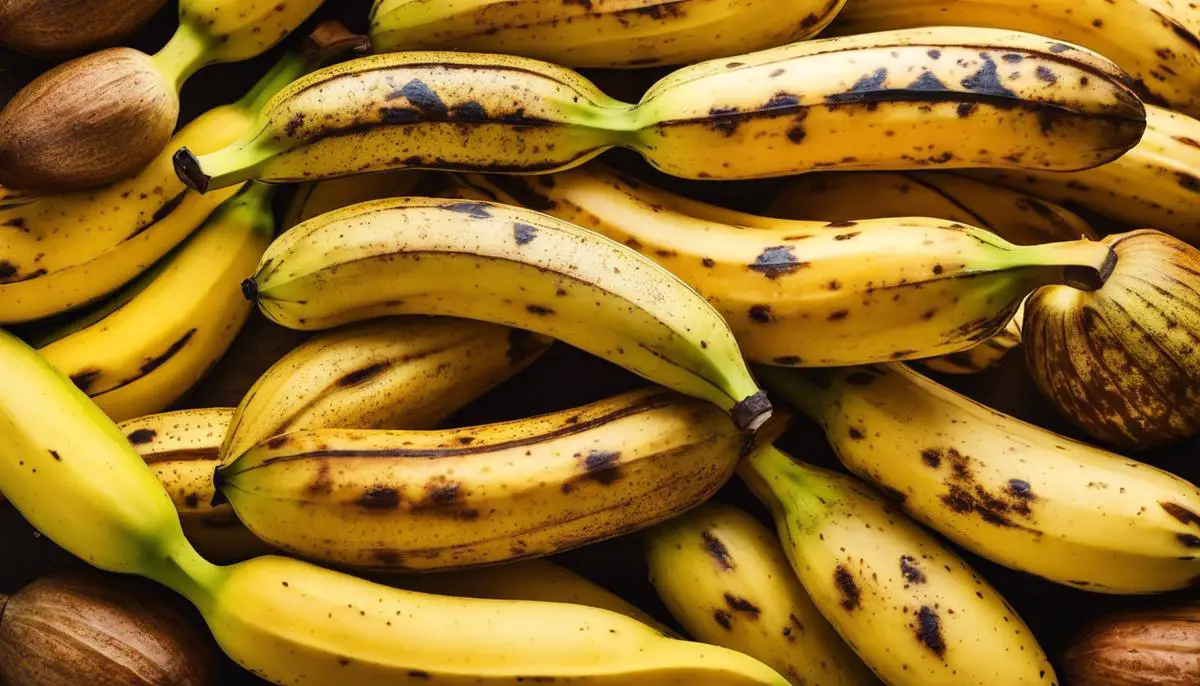
First up, color is key. You’re on the hunt for bananas that have gone past their prime – we’re talking more spots than a Dalmatian! Bright yellow peels? Not today! Instead, look for bananas sporting plenty of brown or even black spots. This means they’re super ripe and brimming with natural sugars, perfect for keeping your banana bread moist and full of that deep, caramelized flavor we all adore.
Now, lets talk squishiness. Give those bananas a gentle squeeze. You want them to give a little under the pressure, indicating they’ve softened up nicely. Too firm, and those bananas will be stingy with flavor and moisture. But caution, if it feels like pure mush in your hand, it’s likely overripe. Overripe bananas can add more liquid than desired, risking a goo-fest in your bread.
Sniff test, anyone? Bring the banana close and take a whiff. What you want is that sweet, heavenly banana aroma to waft through the air. If it smells bland, your taste buds are in for a snooze fest. Pungent banana scent equals flavor central for your banana bread.
Pro tip time—plan ahead. It’s like a waiting game. Buy those bananas in advance, let them ripen on your counter, and nature will do its thing, turning starch into sugar. Be patient and the flavor payoff in your banana bread will have you winning at life.
Here’s the clincher: don’t shy away from bananas that look like they’ve seen better days. Those babies, which others might pass up, are your ticket to a moist and flavorful banana bread. Just ensure there’s no mold, and you’re good to go.
In the mix, these soft, ripe bananas will break down like a dream, melding their sweetness and moisture with all your carefully whisked ingredients. You’ll bake up a loaf that’s tender, fragrant, and oh so satisfying. Cut yourself a thick, warm slice—you’ve earned it!
So, when it’s banana bread time, remember: brown and spotty, a little soft, and sniff-sweet bananas are your besties. Follow these pointers and get ready to bake that unforgettable loaf that’ll have friends and family swinging back for more, like a bunch of happy monkeys!
Bake Time and Temperature
Alright, banana bread aficionados, pull up your oven mitts and get ready to take notes. The journey to that tender, moist, and flavor-packed loaf isn’t just about mashing bananas and whisking flour. Nope, it’s an art form where temperature and timing play a crucial role. And I’ve got the lowdown on how to nail that perfect bake every single time, so let’s jump in!
First things first, preheating your oven is non-negotiable. No ifs, ands, or buts about it. A cool oven is a no-go zone for banana bread or any baked good for that matter. The sweet spot for baking your loaf is at 350 degrees F (that’s about 175 degrees C for my metric-system friends). Why 350, you might ask? It’s the golden mean: hot enough to get that rise and color but not so scorching that the outside chars while the insides are playing catch-up.
Now, let’s talk shop – or rather, let’s talk timing. We’re not making a brick here; we want a beautiful, golden-brown loaf of banana bread glory. It’s going to take patience, somewhere in the realm of 50 to 65 minutes. Yeah, it’s a bit of a range, but here’s why: not all ovens are created equal, and not all banana breads are the exact same size. The key is to start watching it like a hawk at the 50-minute mark.
Test the middle of your bread with a toothpick, cake tester, or if you’re in a pinch, a thin, clean knife. When it comes out clean or with a few moist crumbs clinging for dear life, your bread is done. You might find some gooey batter if it’s not quite there yet, and that’s okay—just give it a few and check again.
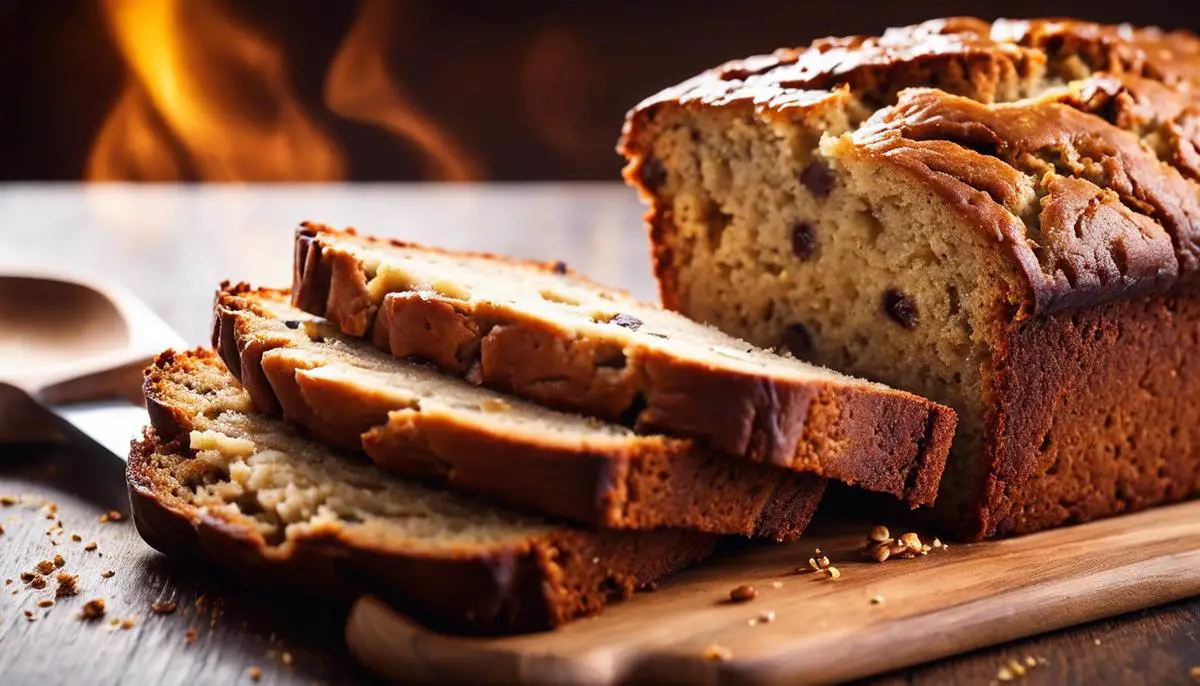
You’ll know your banana bread has hit the sweet spot when it’s sporting a rich, amber-crusted top, and it’s pulling away ever-so-slightly from the sides of the pan. It’s saying, “I’m ready! Let’s do this.” Remember, ovens can run hot or cold, so keep an eye on your bread’s journey to perfection.
Once you pull that steaming beauty out of the oven, give it some time to chill out in the pan, somewhere around 10 minutes. Don’t rush this. It’s like letting a steak rest—you want all that goodness to stay in the bread, not on the pan. Then, transfer it onto a wire rack to cool down completely. That’s when the flavors really start to come together, and a slice of this bread reaches its peak yumminess.
So there you have it, the blueprint to that ‘couldn’t-possibly-get-any-better’ slice of banana bread heaven. Remember, respect the 350-degree F throne, and keep your eyes on the time. Happy baking, and get ready to bask in the glory of the ultimate banana bread, made impeccably by none other than you!
So now you’ve got the scoop on turning those lackluster bananas into a loaf of pure bliss. Remember, it’s all about giving those wet and dry ingredients their separate moments to shine, choosing bananas that are more spots than yellow, and keeping an eye on that oven like it’s the season finale of your favorite show. Get these down, and you’ll have a banana bread that’s not just bread—it’s a slice of home. Happy baking, and even happier munching!
