Master Cookie Baking Tips for Delicious Results
Embarking on a cookie baking adventure can be both fun and rewarding. With countless recipes at your disposal and various techniques to master, the art of cookie making holds endless possibilities. This guide serves as a comprehensive resource, covering a wide range of topics from understanding essential ingredients to mastering advanced cookie recipes. Whether you’re a novice baker or an experienced cookie aficionado, these tips and tricks will help you elevate your baking skills and create delicious, crowd-pleasing treats.
Understanding the Basics
Understanding the Basics of Cookie Baking: Essential Ingredients and Their Purpose
Cookie baking can be a fun and enjoyable process, but it’s crucial to understand the essential ingredients and their purpose to achieve the best results. In this guide, we’ll discuss the primary ingredients required for cookies and the effects of ingredient ratios on the final product.
1. Butter
Butter is a critical component in cookies, as it provides moisture, texture, and enhances the flavor. It is also responsible for making cookies tender and helps in their browning. Most cookie recipes call for unsalted butter, so the salt content can be controlled. Remember to bring the butter to room temperature before using, as this allows it to cream properly with sugar.
2. Sugar
There are generally two types of sugar used in cookie baking: granulated sugar and brown sugar. Both sugars serve to sweeten the cookies, but they also contribute to their texture. Granulated sugar creates a crispier cookie, while brown sugar, due to its molasses content, makes them chewier and adds a subtle caramel flavor. Some recipes may use a combination of both sugars to achieve a balanced outcome.
3. Eggs
Eggs help to bind the ingredients together and provide structure for the cookies. The proteins in eggs solidify as they bake, giving the cookies their form and shape. Additionally, the yolk adds moisture, which contributes to a tender texture. Most recipes will ask for large eggs at room temperature, which mix better and provide even baking.
4. Flour
All-purpose flour is the standard flour for cookie baking, providing both structure and texture. The flour creates gluten when mixed with liquid from other ingredients, leading to the chewy texture of cookies. Be sure to measure your flour accurately, as too much can lead to a dry or tough cookie.
5. Baking Soda or Baking Powder
These two ingredients act as leavening agents that help the cookies rise and spread during baking. Baking soda creates a more spread-out and crispier cookie, while baking powder provides a cake-like texture and causes the cookies to rise more. Some recipes may require a combination of both, depending on the desired outcome.
6. Salt
While it may be surprising to find salt in a cookie recipe, it plays a vital role in enhancing and balancing the overall flavor. Without salt, the cookies may taste flat and overly sweet. It is essential to follow the recipe’s recommendation on salt quantity, as too much or too little can drastically affect the taste.
7. Vanilla Extract
Vanilla extract adds a depth of flavor to cookies, harmonizing the taste and providing a subtle sweetness. It’s important to use pure vanilla extract instead of imitation, which can have an artificial taste.
Understanding Ingredient Ratios and Their Effects
The ratios of these essential ingredients significantly affect the final outcome of your cookies. For instance:
- A higher butter to sugar ratio can result in softer, chewier cookies.
- More granulated sugar compared to brown sugar can create crispier cookies.
- More eggs in a recipe can add moisture and make the cookies a bit cake-like.
- A higher flour content leads to thicker and denser cookies.
Experimenting with ingredient ratios is a great way to explore different textures and flavors in your cookie baking. However, it’s essential to follow a trusted recipe when starting, and over time, tailor the ratios to suit your personal preferences.

Choosing the Right Recipe
Introduction:
Cookie baking is a versatile and enjoyable pastime enjoyed by many. With a variety of cookie recipes to choose from, it can be a little overwhelming to figure out which one is best suited for you, your family, or a special occasion. To make things easier, we have compiled some helpful tips for selecting the perfect cookie recipe based on personal preference, taste, and occasion.
Step 1: Understand the Different Types of Cookies:
Before diving into specific recipes, it’s essential to understand the different types of cookies out there and their general characteristics.
- Drop Cookies: These cookies are made from a soft dough, which is “dropped” onto the baking sheet. Examples include chocolate chip, oatmeal, and peanut butter cookies. They tend to have a chewy texture.
- Rolled Cookies: With a stiffer dough, these cookies are rolled out and cut into shapes using cookie cutters. Sugar cookies are a common example of this type, and they often have a more crisp texture.
- Refrigerator Cookies: Also known as slice-and-bake cookies, these cookies involve forming the dough into a log and chilling it, then slicing it into rounds before baking. They typically have a more dense, crumbly texture.
- Bar Cookies: These cookies are made by spreading the dough in a baking pan and then cutting it into bars or squares after baking. Brownies and blondies are popular examples of bar cookies.
Understanding the above categories of cookies will help you identify and choose recipes according to your preferred texture and preparation style.
Step 2: Identify Your Taste Preferences:
Evaluate your taste preferences to help narrow down the perfect cookie recipe. Consider the following aspects:
- Sweetness: Some people prefer an overly sweet cookie, while others may prefer a more subtle sweetness. Keep this in mind when choosing your recipe.
- Flavor: There are countless flavor options when it comes to cookies. From chocolate to fruit, nuts, or spices, think about which flavors excite you the most.
- Texture: As mentioned earlier, cookies vary in texture. If you prefer a chewy cookie, you might opt for a drop cookie recipe, whereas if you prefer a crunchy cookie, a rolled cookie recipe may better suit you.
Step 3: Consider the Occasion:
The occasion for baking cookies can play a role in choosing the right recipe. Here are some ideas based on various occasions:
- Holidays: For holiday baking, choose festive recipes such as gingerbread cookies, decorated sugar cookies, or peppermint chocolate cookies.
- Gifting: If you are planning to gift cookies, choose a recipe that travels well, such as shortbread cookies or biscotti.
- Potlucks or parties: For gatherings, it’s useful to select recipes that can yield large batches or offer a variety of flavors, such as a cookie bar recipe with a mix of ingredients.
- Everyday snacking: For everyday treats, opt for simple and quick recipes that don’t require too much preparation, such as drop cookies or no-bake cookies.
Step 4: Research and Review:
Before settling on a recipe, take some time to research and read reviews from others who have tried the recipe. This can provide helpful insight on flavor, texture, and any potential issues or modifications for the recipe.
With these tips in mind, you’ll be better equipped to choose a cookie recipe that suits your taste preferences and the occasion at hand. Happy baking!

Preparing the Dough
Title: Preparing the Dough: Techniques for Creaming, Mixing, and Combining Ingredients
Introduction: Cookie baking is a favorite pastime for many, but achieving that perfect dough consistency can be a bit tricky. In this guide, we will discuss proper techniques for creaming, mixing, and combining ingredients to create the ideal dough for your cookie baking adventures.
Step 1: Gather and Measure Your Ingredients
Before starting, gather all the necessary ingredients and measure them out accurately. Using the right proportions of ingredients is vital for the dough’s consistency.
- Butter or margarine
- Granulated sugar, brown sugar, or a combination
- Eggs
- Vanilla extract
- All-purpose flour
- Baking soda and/or baking powder
- Salt
- Add-ins such as chocolate chips, nuts, or dried fruit (optional)
Step 2: Soften the Butter
Softened butter is crucial for successful creaming. Take the butter out of the refrigerator about 30 to 60 minutes before starting. The butter should be soft enough to leave an indentation when pressed yet firm enough to hold its shape.
Tip: If you forget to take the butter out ahead of time, you can microwave it for 10-15 seconds to soften it slightly.
Step 3: Cream the Butter and Sugar
Place the softened butter and sugar into a large mixing bowl. Using a hand mixer or a stand mixer fitted with a paddle attachment, cream the butter and sugar together on medium-high speed for about 2 to 3 minutes. The mixture should become light and fluffy with a pale color.
Tip: Be sure to scrape down the sides of the bowl during this process to ensure even creaming.
Step 4: Add the Eggs and Vanilla
In a separate bowl, lightly beat the eggs and add the vanilla extract. Gradually add this mixture to the creamed butter and sugar while mixing on low speed. Once combined, increase the speed to medium-high and mix until the ingredients are thoroughly incorporated, scraping down the sides of the bowl as needed.
Step 5: Combine the Dry Ingredients
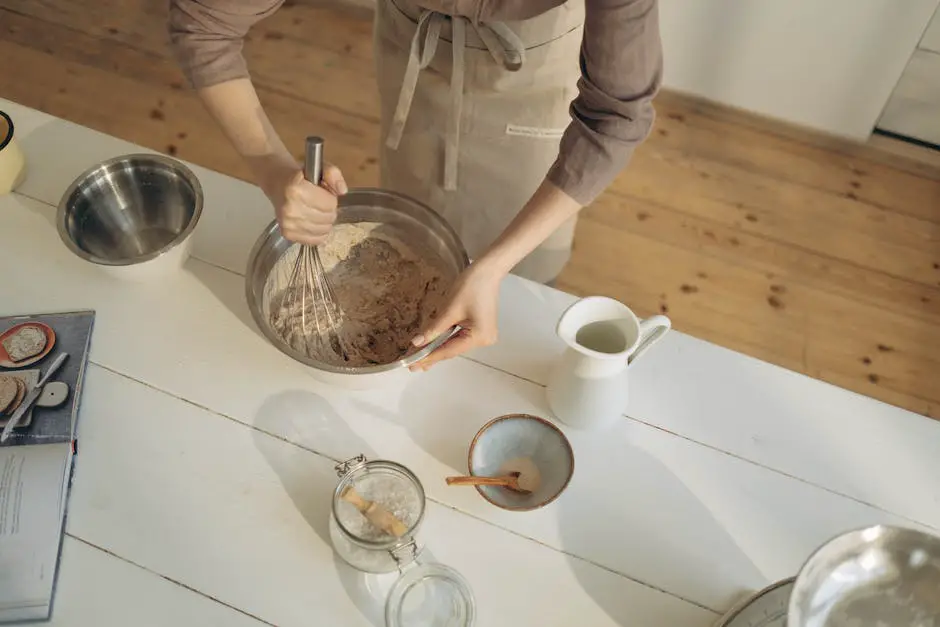
In another bowl, whisk together the flour, baking soda, baking powder (if using), and salt. This mixture should be evenly mixed.
Step 6: Gradually Add the Dry Ingredients
Slowly add the dry ingredients to the wet ingredients, mixing on low speed. Keep adding until the ingredients are just combined, taking care not to overmix the dough. Overmixing can lead to tough cookies.
Step 7: Fold in Add-ins (Optional)
If adding nuts, chocolate chips, or dried fruit to your cookie dough, gently fold these in with a rubber spatula until evenly distributed.
Step 8: Chill the Dough (Optional)
Chilling the dough for at least 30 minutes can improve its texture and make it easier to handle. This is especially helpful for cookie doughs that may be too sticky to work with at room temperature.
Conclusion: Now that you know the proper techniques for creaming, mixing, and combining ingredients, you are well on your way to achieving the perfect dough consistency. Following these steps will help ensure that your cookies turn out delicious every time. Happy baking!
Chilling and Resting Dough
Title: Chilling and Resting Dough: Importance and Benefits for Flavorful and Perfectly Textured Cookies
Cookie baking can be a fun and delicious activity, but to achieve the perfect texture and taste, it’s important to understand the importance of chilling and resting the dough prior to baking. Chilling and resting your dough prevents the cookies from spreading too thin and helps develop the robust flavors. In this guide, you will learn how and why you should chill and rest your dough for expertly baked cookies.
Step 1: Why Chilling Matters
Chilling the dough cools down the fats in the mixture, primarily the butter, which prevents it from melting too quickly during the baking process. When fat melts too fast, it causes the cookies to spread out too thin, resulting in uneven and unsightly bakes. Here are key benefits of chilling your dough:
- Improved texture – Chilled dough maintains its shape and spreads less when baking, leading to a thicker, softer, and more appealing bite.
- Enhanced flavor – Chilling allows the flavors to meld and develop, creating a more complex and richer taste.
- Less stickiness – Chilled dough is easier to handle, making it less sticky and simplifying the process of rolling and cutting shapes.
Step 2: How to Chill Your Dough
Once you’ve prepared your cookie dough, it’s time to let it chill. Follow these steps for an effective chilling process:
- Shape your dough – Depending on the type of cookie, you can shape your dough into a disk (for cut-out cookies), a log (for slice-and-bake cookies), or keep it in the mixing bowl.
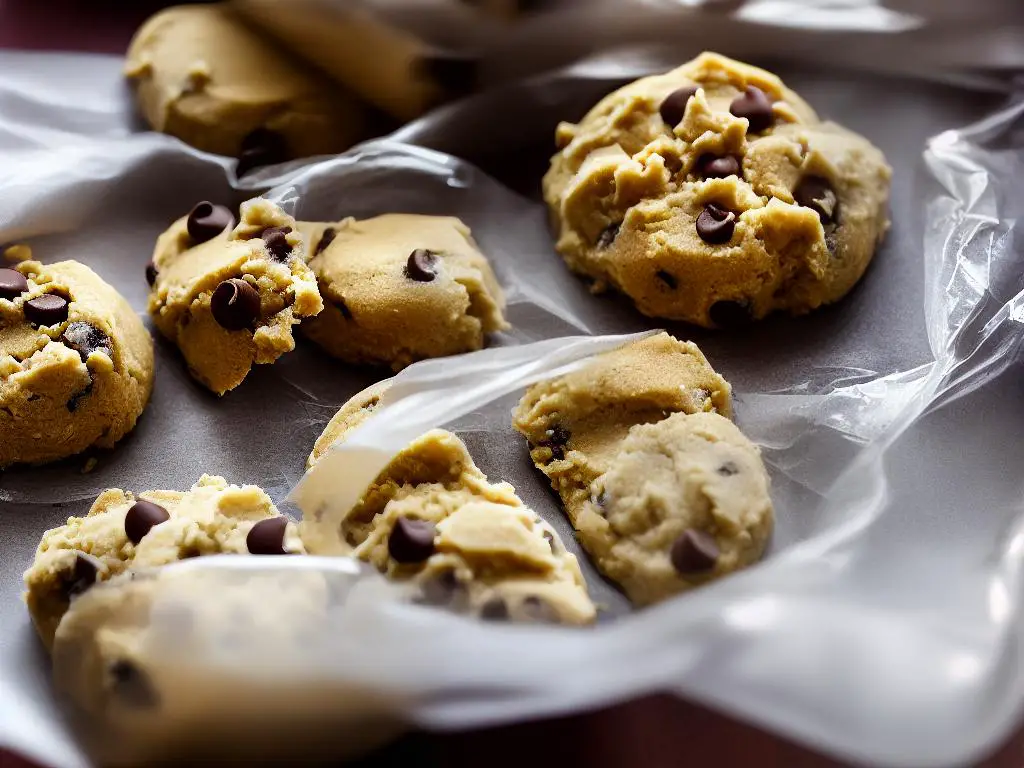
- Wrap your dough – If shaped, wrap your dough tightly in plastic wrap. If you’re keeping it in the mixing bowl, cover securely with plastic wrap or a lid.
- Refrigerate – Place the wrapped dough or covered bowl in the refrigerator for at least 1 hour or up to overnight. Avoid storing your dough in the door of the fridge as it may not maintain the most consistent temperature.
Step 3: Resting Your Dough
After chilling, it’s essential to let your dough rest at room temperature for a short time before baking. Here are the steps to follow for resting your dough:
- Resting time – Let your dough sit at room temperature for about 10-20 minutes, depending on the dough’s consistency. This allows your dough to soften slightly, making it easier to roll out or scoop without being too firm.
- Preheat your oven – Use the resting time to preheat your oven according to the recipe’s instructions, ensuring it’s ready once your dough is adequately rested.
- Move to the baking step – Once your dough is rested and slightly softened, it’s time to roll, cut, or scoop the cookies and bake them to perfection.
Conclusion:
By understanding the importance of chilling and resting your cookie dough, you can achieve perfect texture and flavor in your baked goods. Remember to chill the dough for at least 1 hour or up to overnight, followed by a brief resting period at room temperature. These steps will lead you to the delicious and delectable cookies you’re aiming to create. Happy baking!
Rolling, Cutting, and Shaping Cookies
Title: Rolling, Cutting, and Shaping Cookies: Master Various Methods for Consistent Sizes, Shapes, and Thickness
Achieving consistent sizes, shapes, and thickness in your cookies is essential for even baking and creating perfectly delicious treats. In this guide, you’ll learn various methods for rolling, cutting, and shaping cookies to improve the presentation and taste of your homemade goodies.
Materials:
- Cookie dough (homemade or store-bought)
- Rolling pin
- Cookie cutters or sharp knife
- Parchment paper or silicone baking mat
- Baking sheets
- Flour (for dusting)
- Cooling rack
- Optional: plastic wrap
Instructions:
Step One: Preparing Your Dough and Workspace
1.1 Start by chilling your cookie dough: Properly chilled dough is crucial for rolling and shaping cookies. If you’re using store-bought dough, follow the recommended chilling time on the package. For homemade dough, chill it in the refrigerator for at least 1-2 hours or according to your recipe directions.
1.2 Prepare your workspace: Clean the surface you will be using to roll out your dough. Spread out a sheet of parchment paper or silicone baking mat on your work surface for easy clean-up.
1.3 Lightly flour your rolling pin, cookie cutters, and workspace to avoid the dough sticking to surfaces.
Step Two: Rolling the Dough
2.1 Roll out the dough: Remove your chilled dough from the refrigerator and allow it to sit at room temperature for a few minutes. Place your dough on the prepared surface and, using your floured rolling pin, roll it out to your desired thickness (typically ¼-½ inch thick).
Step Three: Cutting and Shaping the Cookies
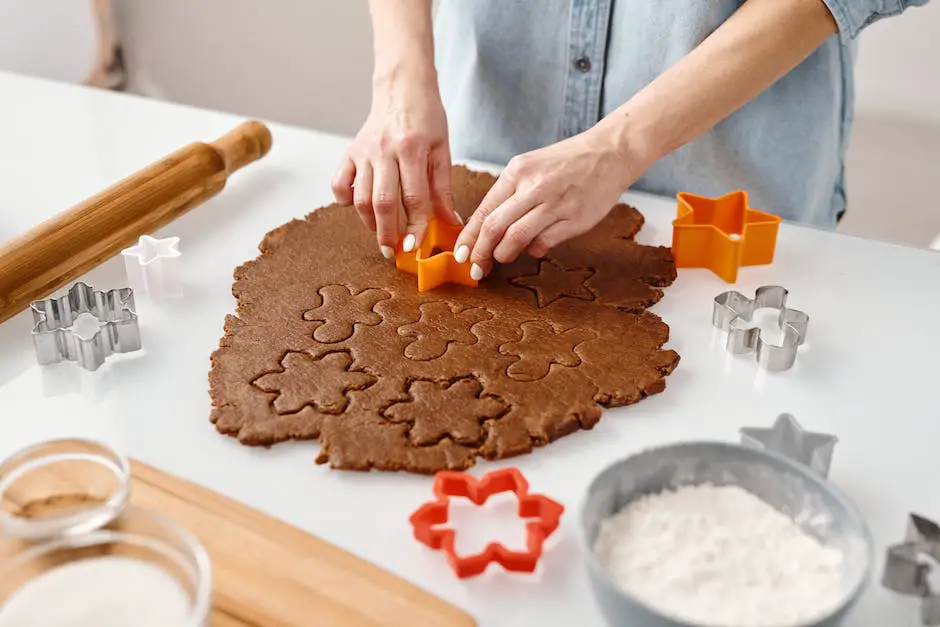
3.1 Use cookie cutters: If you have cookie cutters in various shapes, press them firmly into the dough, being careful to cut the cookies as close together as possible to minimize dough waste. Gently remove the excess dough around the cookie cutters and lift the cut-out shapes onto a parchment-lined baking sheet.
3.2 Use a sharp knife: If you don’t have any cookie cutters, improvise by using a sharp knife. With a ruler or freehand, cut straight lines to create squares, rectangles, or diamonds. You can also create round cookies by using a glass as a makeshift cookie cutter.
3.3 Create shapes by hand: For some cookie types, like thumbprint or drop cookies, simply use your hands to shape the dough into the desired forms. For thumbprint cookies, form balls of dough and press your thumb into the center of each cookie to create a small indent. For drop cookies, use a scoop or tablespoon to drop spoonfuls of dough onto your baking sheet.
Step Four: Baking and Cooling
4.1 Preheat your oven according to your recipe’s directions or the instructions on the store-bought dough package. Make sure your oven is fully preheated before inserting the cookies to ensure even baking.
4.2 Bake the cookies based on your recipe or package instructions, usually around 8-12 minutes. Keep an eye on them to ensure they don’t overcook or burn at the edges. The cookies should be lightly golden on the outside with a slightly soft center.
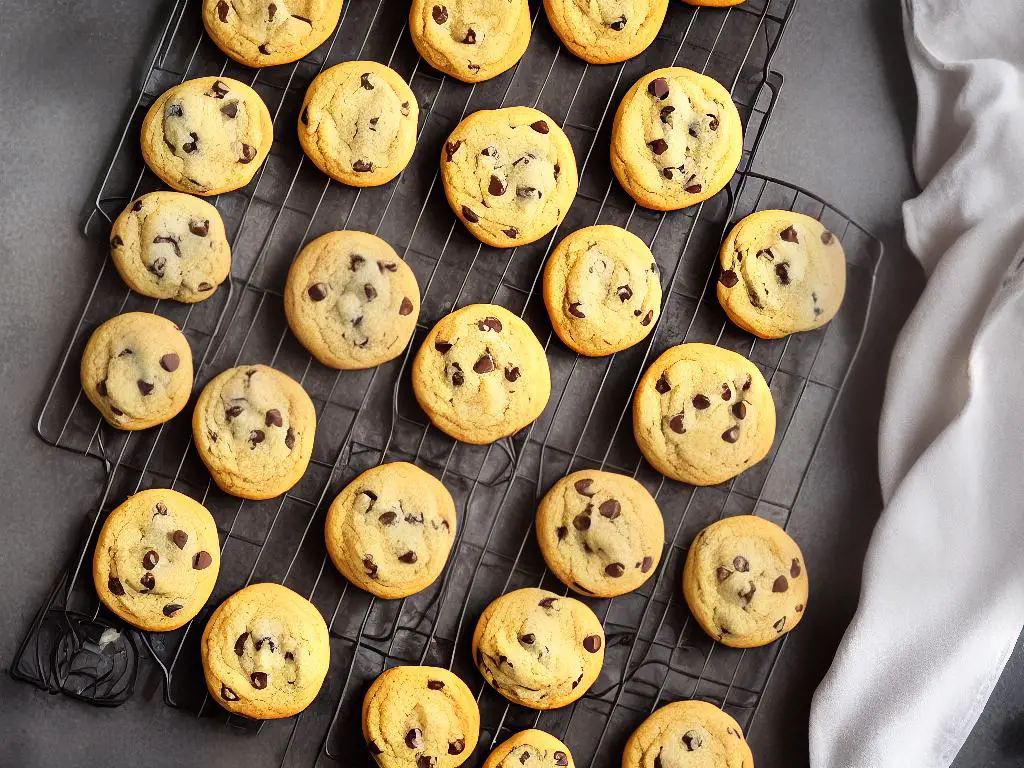
4.3 After baking, let the cookies cool on the baking sheet for about 5 minutes before transferring them to a cooling rack to cool completely. This allows the cookies to set and become firm enough to handle without breaking.
Conclusion:
With practice and attention to detail, you can master the art of rolling, cutting, and shaping cookies for flawless and evenly baked treats. Remember, the key to success is using properly chilled dough and following the tips outlined in this guide. Happy baking!
Baking Techniques and Tools
Title: Essential Cookie Baking Techniques, Tools and Tips
Introduction:
Baking cookies can be a fun and rewarding experience, especially when you have the right tools, techniques, and tips at your disposal. In this guide, we will cover essential cookie bakeware, common baking tools, and tips for monitoring baking time and adjusting oven temperatures. By following this guide, you will be well on your way to creating delicious cookies that everyone will love.
Essential Cookie Bakeware:
- Baking sheets: Choose rimless or flat baking sheets with a non-stick surface to ensure your cookies bake evenly and come off the pan easily. Investing in good-quality, heavy-duty baking sheets will help prevent warping and promote even heat distribution.
- Silicone baking mats or parchment paper: To prevent cookies from sticking to the baking sheet, use silicone baking mats or parchment paper. These materials also make for an easy cleanup, and they are reusable.
- Wire racks: Cooling cookies on a wire rack allows air to circulate around them, helping them to cool and set evenly.
Common Baking Tools:
- Mixing bowls: Have a variety of sizes on hand for combining your dry and wet ingredients.
- Measuring cups and spoons: Accurate measurements are essential for successful baking, so be sure to use measuring cups and spoons specifically designed for baking.
- Whisk, Wooden spoon, and Rubber spatula: These tools help incorporate ingredients and fold in mix-ins like chocolate chips, nuts, or raisins.
- Cookie scoop or tablespoon: Using a cookie scoop or a tablespoon ensures evenly-sized cookies, which will bake evenly and have a consistent appearance.
- Offset spatula: This tool is great for transferring delicate cookies from the baking sheet to the cooling rack without breaking them.
Tips for Monitoring Baking Time & Adjusting Oven Temperatures:
- Preheat your oven: Always preheat your oven for at least 10-15 minutes before baking to ensure an even temperature.
- Use an oven thermometer: Invest in an oven thermometer to check the accuracy of your oven’s temperature. This will help prevent cookies from under- or over-baking.
- Rotate your baking sheets: To ensure even baking, rotate your baking sheets halfway through the baking process, especially if your oven has hot spots.
- Observe visual cues: Each cookie recipe varies, so pay attention to the visual cues provided in the recipe, such as lightly golden edges or a matte finish on the center of the cookie.
- Start with the lowest suggested baking time: To avoid over-baking cookies, start by setting your timer to the lowest suggested baking time and add more time if necessary, checking the cookies frequently.
Conclusion:
Using the right bakeware and tools, as well as following these essential techniques and tips, will make your cookie-baking experience a breeze. With practice and experimentation, you will soon become an expert in baking delicious, crowd-pleasing cookies. Happy baking!
Preventing Common Baking Mistakes
Title: Preventing Common Baking Mistakes: Troubleshooting and Tips for Perfect Cookies
Introduction:
Baking cookies is a delightful activity, but sometimes the outcome may not be what we expected. A number of common baking mistakes can lead to overcooking, uneven browning, and spreading. This guide will help you identify these issues and provide tips on how to prevent them, ensuring great results every time you bake cookies.
1. Overcooking:
- Keep an eye on your cookies while they’re baking. Check on them a few minutes before the recipe’s recommended baking time.
- Consider the size of your cookies. Smaller cookies will cook faster, while larger ones will take longer. Be sure to adjust the baking time accordingly.
- Use an oven thermometer. An oven’s temperature might be off by several degrees, potentially causing overcooking or undercooking. Check the accuracy of your oven with a thermometer and adjust if necessary.
- Remove cookies from the oven when the edges are golden brown but the centers are still slightly soft. They will continue to cook on the baking sheet as they cool, achieving the perfect texture.
2. Uneven browning:
- Use light-colored baking sheets. Darker-colored pans absorb more heat and can cause the bottoms of your cookies to brown more quickly than the tops.
- Space your cookies evenly on the baking sheet, allowing for proper heat circulation.
- Rotate your baking sheets halfway through the baking time to ensure even browning. This is especially important if your oven has hot spots – areas with a higher temperature than the rest of the oven.
- Be consistent with the shape and thickness of your cookies to ensure even cooking.
3. Spreading:
- Chill the dough before baking. This helps solidify the fats in the dough, making it less likely to spread while baking.
- Use parchment paper or silicone baking mats instead of greasing the baking sheets. Greasing can contribute to spreading by allowing the cookies to slide more easily.
- Be cautious with substitutions. Using different ingredients, like margarine instead of butter or a liquid sweetener instead of granulated sugar, might affect the cookie’s texture and shape. Stick to the recipe or find one specifically designed for your desired substitutions.
- Measure your ingredients correctly. Too much butter, sugar, or leavening agents can cause cookies to spread.
- Preheat the oven. Putting cookies into an oven that is still heating up can cause them to spread more than intended.
Conclusion:
By understanding the common problems that can occur while baking cookies and following the tips provided, you can prevent these issues and achieve perfect, delicious cookies every time. Happy baking!

Decorating and Flavor Enhancements
Title: Cookie Baking Tips: Decorating and Flavor Enhancements for Stunning and Delicious Cookies
Introduction: Baking cookies…
1. Gather your decorating supplies:
- Assorted cookie cutters
- Cooling racks
- Silicone or non-stick baking mats
- Parchment paper
- Rolling pin
- Icing or glaze (homemade or store bought)
- Food coloring for colored icing
- Decorating bags, and tips
- Toothpicks, skewers, or forks for swirling colors
- Sprinkles, edible glitter, and other decorative add-ons
2. Bake and cool your cookies:
Before you can start decorating…
3. Prepare your icing or glaze:
To decorate your cookies…
4. Decorate with icing:
There are many different ways…
5. Add flavor enhancements:
You can enhance the flavor of your cookies…
6. Allow the icing or glaze to dry:
After decorating your cookies…
7. Store and enjoy:
Once the icing or glaze has dried…
Conclusion: Decorating and enhancing…

Storing and Shipping Cookies
Introduction:
Baking cookies can be a fun and rewarding experience, but it’s important to know how to properly store and ship them to maintain their taste and freshness. This guide will provide you with helpful tips on storing and packaging cookies, as well as advice on how to ship them without causing any damage.
Part 1: Storing Cookies
- Cool Cookies Completely: Before storing or packing cookies, ensure they have cooled completely. Placing warm cookies in a container can cause condensation, which can lead to soggy cookies or mold growth.
- Choose the Right Container: Use an airtight container to keep your cookies fresh for an extended period. Hard-sided plastic containers or metal tins are preferable, as they provide better protection than plastic bags or wrap.
- Separate Different Types of Cookies: Store different types of cookies separately to prevent flavors and textures from mixing. For example, keep crisp cookies away from soft, chewy ones to maintain their individual textures.
- Use Wax or Parchment Paper: Place sheets of wax or parchment paper between layers of cookies in a container to prevent them from sticking together.
- Store at Room Temperature: Most cookies can be stored at room temperature for up to a week. However, some cookies, like those with a cream filling or fruit topping, may need to be refrigerated.
- Freeze for Longer Storage: If you don’t plan on eating or shipping your cookies right away, consider freezing them. Most cookies can be frozen for up to three months. Be sure to wrap them well in plastic wrap and place them in a resealable plastic bag or airtight container before freezing.
Part 2: Shipping Cookies
- Choose Sturdy Cookies: Some cookies are more fragile than others and may not withstand the shipping process. Opt for sturdy cookies like shortbread, sugar cookies, or biscotti that are less likely to break during transit.
- Bubble Wrap and Padding: Protect your cookies by wrapping each one individually in bubble wrap, plastic wrap, or aluminum foil. In the shipping box, use additional padding materials such as crumpled paper, packing peanuts, or more bubble wrap to fill any empty spaces and provide extra cushioning.
- Use a Sturdy Shipping Box: Choose a sturdy, corrugated shipping box that is slightly larger than your cookie container. This will allow for extra padding on all sides to help prevent damage during shipping.
- Place Container Inside the Shipping Box: Place your wrapped and padded container inside the shipping box. Surround the container with additional padding to ensure it does not move around during transit.
- Mark the Box as Fragile: Clearly label the shipping box with “Fragile” and “Perishable” stickers or markings to inform the shipping carrier of the delicate nature of the contents. Additionally, clearly write the recipient’s address and your return address on the box.
- Schedule a Prompt Shipping Method: To help guarantee the freshness of your cookies, choose a shipping method that will deliver your package in a timely manner. It’s best to avoid shipping cookies over weekends or holidays when they may sit in a warehouse or shipping facility for an extended period.
Conclusion:
By following these tips and instructions, you can ensure your cookies remain fresh and undamaged, whether you are storing them for later enjoyment or shipping them to loved ones. Happy baking and sharing!
Trying Advanced Cookie Recipes
Title: Trying Advanced Cookie Recipes: Challenge Yourself with Intricate Designs and Unique Flavor Combinations
Introduction: As a cookie enthusiast, you may want to take your baking skills up a notch and try your hand at advanced cookie recipes. There are several techniques you can utilize to improve your baking prowess and create intricate designs and unique flavor combinations in your cookies. This guide provides tips and tricks that will help you on your journey to becoming a master cookie baker.
Materials:
- Your choice of advanced cookie recipe
- Measuring cups and spoons
- Mixing bowls
- Electric mixer
- Silicone baking mats or parchment paper
- Rolling pin
- Cookie cutters or a sharp knife
- Offset spatula
- Piping bags and/or squeeze bottles
- Decorating tips or fine writing tips
- Food coloring (optional)
- Flavor extracts (optional)
- Various spices and other mix-ins (optional)
- Digital kitchen scale (optional, but highly recommended for accuracy)
Instructions:
- Choose an advanced cookie recipe: Look for recipes with intricate designs or unique flavor combinations. You can find inspiration from websites, cookbooks, or food blogs.
- Prepare your work space: Clean your countertop or table and ensure you have all your tools and ingredients ready for your baking session. Having a well-organized workspace will help you focus on your task and minimize mistakes.
- Review the recipe thoroughly: Before you begin, read through the entire recipe and make sure you understand every step. Take note of any specific techniques or instructions the recipe calls for.
- Measure ingredients with precision: Use measuring cups and spoons or a digital kitchen scale to ensure you have accurate measurements of ingredients. This will help you get consistent results every time you bake.
- Combine ingredients carefully: Follow the recipe’s instructions for mixing your ingredients. This may include creaming together butter and sugar, whisking together dry ingredients, or folding in mix-ins like chocolate chips or nuts.
- Experiment with flavor combinations: Get creative and try adding new flavors to your cookies with extracts, spices, herbs, and other mix-ins. For example, you can add lavender extract and lemon zest for a unique twist on a sugar cookie or cinnamon and nutmeg in a chocolate chip cookie recipe.
- Roll out dough evenly: Use a rolling pin to roll out your cookie dough evenly. This will help ensure that your cookies bake consistently and have an even thickness.
- Create intricate designs: Use cookie cutters or a sharp knife to cut out intricate shapes or designs from your rolled dough. You may also use a stencil to create a pattern on your cookies. This requires a steady hand and patience but can result in stunning cookies.
- Decorate with precision: Use a piping bag or squeeze bottle to apply icing or melted chocolate with a fine writing tip to achieve detailed and intricate designs. You can also use food coloring to create multi-colored icing for added visual appeal.
- Bake with care: Follow the recipe’s instructions for oven temperature and baking time. Use silicone baking mats or parchment paper to prevent your cookies from sticking to the baking sheet.
- Cool completely: Allow your cookies to cool fully on a wire rack before transferring them to a container or enjoying them. Cooling ensures that the cookies maintain their shape and texture.
Conclusion: With practice, patience, and an adventurous spirit, you can master advanced cookie recipes and create stunning, delicious cookie designs with unique flavor combinations. With these tips and techniques, you’re well on your way to becoming a skilled cookie baker who will undoubtedly impress friends and family with your creations.
With these valuable insights and tips on mastering the art of cookie baking, you’re well on your way to creating mouthwatering masterpieces in the kitchen. Remember to stay patient, practice your skills, and most importantly, have fun along the way. So, tie on that apron, gather your ingredients, and let your cookie creativity run free. Happy baking!
